> ## Documentation Index
> Fetch the complete documentation index at: https://docs.paigebraille.com/llms.txt
> Use this file to discover all available pages before exploring further.

# User Manual

> Complete user manual for Paige Connect v1 - installation, usage, and specifications

## Introduction

Paige Connect is an adaptation for braille writers which records key presses and displays the instantaneous translation on an accompanying web app on a phone, tablet, or laptop. It enables collaboration with sighted peers, parents, and teachers.

Paige Connect transforms your classic Perkins braille writer\* into a Bluetooth keyboard. This makes it compatible with any software that accepts SDFJKL braille input.

<Note>
  Our product is not manufactured or endorsed by Perkins School for the Blind
  and Paige Braille is not affiliated with Perkins School for the Blind.
</Note>

### What's in the box?

* **Paige Connect board:** model `v1`
* **Power cable:** Type A Plug to DC Barrel Plug `2.5 x 5.5 mm`

<Tip>
  Contact us at [hello@paigebraille.com](mailto:hello@paigebraille.com) if any items are missing or damaged.
</Tip>

## Safety and Warnings

<Warning>
  The safety of any system incorporating this equipment is the responsibility of
  the assembler of the system.
</Warning>

* Only use a USB power adapter / computer USB port to power Paige Connect. Using other power supplies can cause an overheating hazard.
* If the equipment is used in any manner not specified by the manufacturer the protection provided by the equipment might be impaired.
* We do not recommend modifying Paige Connect or its original accessories, like the power cable. Only accessories which meet the manufacturer's specifications shall be used.

## Installation Guide

Follow these three simple steps to install Paige Connect in your braille writer.

<Steps>
  <Step title="Remove the base">
    <Card img="https://mintcdn.com/paigebraille/lmUpO0iWtfzCzu7p/images/manual/step1-unscrew.webp?fit=max&auto=format&n=lmUpO0iWtfzCzu7p&q=85&s=583b23a041b078fd156371d3d81f45e7" width="2048" height="1366" data-path="images/manual/step1-unscrew.webp">
      Unscrew the base of your braille writer.
    </Card>
  </Step>

  <Step title="Install Paige Connect">
    <Card img="https://mintcdn.com/paigebraille/lmUpO0iWtfzCzu7p/images/manual/step2-install.webp?fit=max&auto=format&n=lmUpO0iWtfzCzu7p&q=85&s=786d5d1e5c8afaef80a1db9d96f4beb7" width="2048" height="1366" data-path="images/manual/step2-install.webp">
      Replace it with the Paige Connect board. Before tightening the screws move the board side to side until it is positioned so that the space key can lower fully.
    </Card>
  </Step>

  <Step title="Connect power">
    <Card img="https://mintcdn.com/paigebraille/lmUpO0iWtfzCzu7p/images/manual/step3-power.webp?fit=max&auto=format&n=lmUpO0iWtfzCzu7p&q=85&s=ee4e63b61954c1447e5c9456877ab5a1" width="2048" height="1366" data-path="images/manual/step3-power.webp">
      Plug in the USB cable.
    </Card>
  </Step>
</Steps>

## Using Translate Feature

Experience real-time braille to print translation with these simple steps.

<Steps>
  <Step title="Connect via Bluetooth">
    On your phone, tablet or laptop, turn Bluetooth on and pair with Paige Connect.
  </Step>

  <Step title="Visit our website">
    Go to our website at [paigebraille.com/translate](https://paigebraille.com/translate).
  </Step>

  <Step title="Start typing">
    <Card img="https://mintcdn.com/paigebraille/VbRl9UywYr9dN8gm/images/manual/translate-interface.webp?fit=max&auto=format&n=VbRl9UywYr9dN8gm&q=85&s=e5a989e6274663ebffed6a01b9f3e425" width="1136" height="768" data-path="images/manual/translate-interface.webp">
      Start writing braille to see or hear what you emboss!
    </Card>
  </Step>
</Steps>

## Using Learn Feature

Start your braille learning journey with our interactive exercises.

<Steps>
  <Step title="Connect via Bluetooth">
    On your phone, tablet or laptop, turn Bluetooth on and pair with Paige Connect.
  </Step>

  <Step title="Visit learn page">
    Go to our website at [paigebraille.com/learn](https://paigebraille.com/learn).
  </Step>

  <Step title="Start learning">
    <Card img="https://mintcdn.com/paigebraille/VbRl9UywYr9dN8gm/images/manual/learn-interface.webp?fit=max&auto=format&n=VbRl9UywYr9dN8gm&q=85&s=6e04fb1bf1dab1956a1d664fdf66de1c" width="1136" height="770" data-path="images/manual/learn-interface.webp">
      Start learning braille with curated online exercises!
    </Card>
  </Step>
</Steps>

## Technical Specifications

### Mechanical Characteristics

| Specification | Value           |
| ------------- | --------------- |
| Model         | v1              |
| Weight        | 0.2 kg          |
| Size          | 335.75 x 175 mm |
| Cable length  | 1 m             |

### Electrical Characteristics

**Power supply requirements:** `5V (DC)`, Min. `0.5A`

Examples of suitable power sources:

* USB power socket
* Laptop USB port
* USB power adapter

### Environmental Conditions

| Condition   | Range       |
| ----------- | ----------- |
| Temperature | 5°C to 40°C |
| Humidity    | \< 80% RH   |
| Altitude    | \< 2000 m   |

### Safety Compliance Information

* **Degree of protection IEC-60529:** `IPX0`
* **Pollution degree:** `2`

### Symbols

<CardGroup cols={2}>
  <Card>
    <div style={{textAlign: 'center', marginBottom: '1rem'}}>
      <img src="https://mintcdn.com/paigebraille/MAh2hytEdF5dctLb/images/manual/polarity-symbol.svg?fit=max&auto=format&n=MAh2hytEdF5dctLb&q=85&s=7774d87c345c5a0879e695e8513f8c02" alt="Polarity symbol" className="block dark:hidden" style={{width: '80px', height: 'auto'}} width="200" height="60" data-path="images/manual/polarity-symbol.svg" />

      <img src="https://mintcdn.com/paigebraille/MAh2hytEdF5dctLb/images/manual/polarity-symbol-dark.svg?fit=max&auto=format&n=MAh2hytEdF5dctLb&q=85&s=3fcf9eca5def7decc4871ab56a68a971" alt="Polarity symbol" className="hidden dark:block" style={{width: '80px', height: 'auto'}} width="200" height="60" data-path="images/manual/polarity-symbol-dark.svg" />
    </div>

    <p>Polarity Symbol - Indicates the centre (or tip) of the output plug is positive</p>
  </Card>

  <Card>
    <div style={{textAlign: 'center', marginBottom: '1rem'}}>
      <img src="https://mintcdn.com/paigebraille/MAh2hytEdF5dctLb/images/manual/dc-power-symbol.svg?fit=max&auto=format&n=MAh2hytEdF5dctLb&q=85&s=3ac57dbd2166ec943c765c9851c5e78c" alt="DC power supply symbol" className="block dark:hidden" style={{width: '50px', height: 'auto'}} width="130" height="60" data-path="images/manual/dc-power-symbol.svg" />

      <img src="https://mintcdn.com/paigebraille/MAh2hytEdF5dctLb/images/manual/dc-power-symbol-dark.svg?fit=max&auto=format&n=MAh2hytEdF5dctLb&q=85&s=f2a9dbc1c42e65a73b0d9d45bb689dc7" alt="DC power supply symbol" className="hidden dark:block" style={{width: '50px', height: 'auto'}} width="130" height="60" data-path="images/manual/dc-power-symbol-dark.svg" />
    </div>

    <p>DC Power Supply</p>
  </Card>
</CardGroup>

## Maintenance

Once Paige Connect is installed it remains protected from the outside world. However, dust, dirt, and oil can accumulate inside your braille writer over time and affect its performance.

### Preventive Care

* Cover your braille writer with a dust cover when not in use
* Keep food and drinks away from the device
* Store in a clean, dry environment

### Cleaning Instructions

1. **Always unplug** Paige Connect before cleaning
2. Use a **dry and soft cloth** only
3. Do not use liquid cleaners or compressed air
4. Clean gently to avoid damaging sensors

## Spare Parts and Service

### Spare Parts List

* **Power cable:** Type A Plug to DC Barrel Plug `2.5 x 5.5 mm`

<Note>
  No user serviceable parts inside. Please contact us at [hello@paigebraille.com](mailto:hello@paigebraille.com)
  for service, repair and to purchase spare parts.
</Note>

## Recycling and Disposal

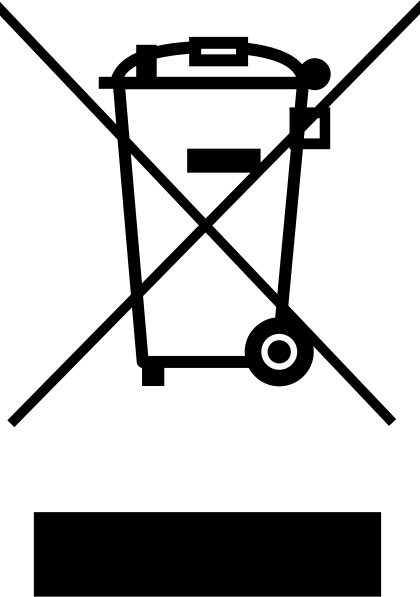
<Warning>Please do not dispose of Paige Connect in regular bins.</Warning>

* Recycle electronic devices free at your local recycling centre
* **UK residents:** Search for your nearest recycling centre at [www.recyclenow.com](https://www.recyclenow.com)
* Many electrical components can be repaired or recycled, saving natural resources and the environment

## Regulatory Markings

Your Paige Connect device complies with the following standards:

<CardGroup cols={2}>
  <Card title="FCC regulations" icon={<><img src="/images/manual/fcc-logo.svg" className="block dark:hidden" style={{width: '60px', height: '45px'}} /><img src="/images/manual/fcc-logo-dark.svg" className="hidden dark:block" style={{width: '60px', height: '45px'}} /></>}>
    Federal Communications Commission compliance

  </Card>

  <Card title="CE marking requirements" icon={<><img src="/images/manual/ce-mark.svg" className="block dark:hidden" style={{width: '60px', height: '45px'}} /><img src="/images/manual/ce-mark-dark.svg" className="hidden dark:block" style={{width: '60px', height: '45px'}} /></>}>
    European Conformity standards
  </Card>

  <Card title="UKCA standards" icon={<><img src="/images/manual/ukca-mark.svg" className="block dark:hidden" style={{width: '60px', height: '45px'}} /><img src="/images/manual/ukca-mark-dark.svg" className="hidden dark:block" style={{width: '60px', height: '45px'}} /></>}>
    UK Conformity Assessed marking
  </Card>

  <Card title="WEEE directive" icon={<><img src="/images/manual/weee-symbol.svg" className="block dark:hidden" style={{width: '60px', height: '45px'}} /><img src="/images/manual/weee-symbol-dark.svg" className="hidden dark:block" style={{width: '60px', height: '45px'}} /></>}>
    Waste Electrical and Electronic Equipment regulations
  </Card>
</CardGroup>

## Download Manual

<Card title="Download Official User Manual" icon="file-word" href="https://paigebraille.com/Manual_rev1.3.docx" cta="Download DOCX (3.9 MB)">
  Download the complete Paige Connect user manual in Microsoft Word format (Rev
  1.3)
</Card>

***

© Paige Braille Ltd